ROKURO
- Sculpted Prim / Mesh Maker -
by Yuzuru Jewell(KANAE PROJECT) produced by youwith.
http://maps.secondlife.com/secondlife/Phasic%20Foo/45/28/24
When you are ready to make more complex shapes, you may purchase other sculpted prim programs from the shop at the above SLurl address.
These include:
- TATARA
- KUMIKI
- NOMI
- SOMATO
- And others
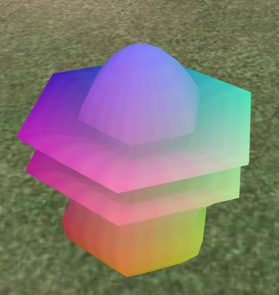
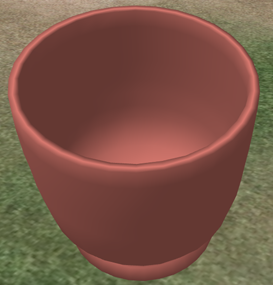
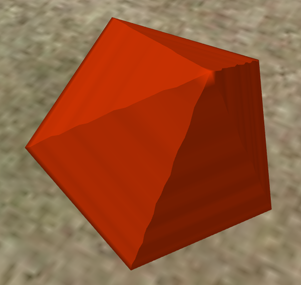
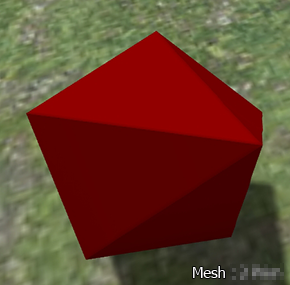
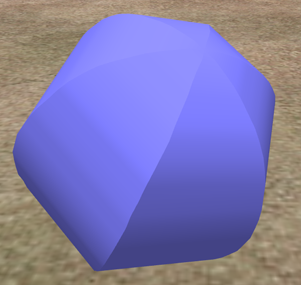
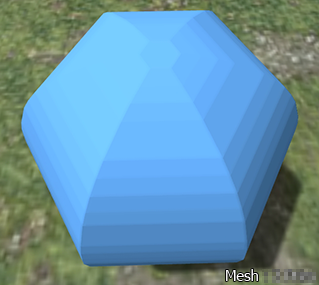
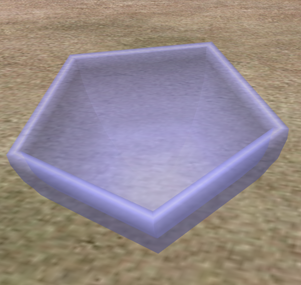
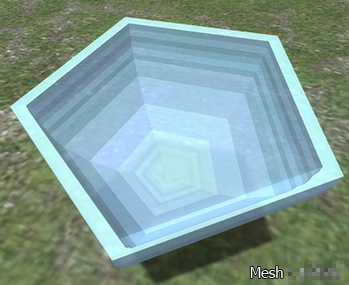
This Program makes Sculpted Prim textures as .tga files and Collada files for the the Mesh of Second Life. The shapes are similar to lathe products, a carved solid around a central axis.
-UV map and the number of vertices of the Collada file which is outputted by ROKURO are the same as Sculpted Prim.
-Hard Angle is specified automatically.
-If you select LoD option, you can save 3 levels of Level of Detail files.
Download
License
The Software is provided "AS IS," without a warranty of any kind.
In no case shall the author be liable for any damage or unwanted behavior of any computer hardware and/or software.
Operating environment
Windows 10 64bit/32bit
Windows 10/11 64bit
Lion/Mountain Lion
Install & Uninstall
Install
There is no installer.
Uninstall
You can uninstall only by deleting "ROKURO4" file.
How to use this program
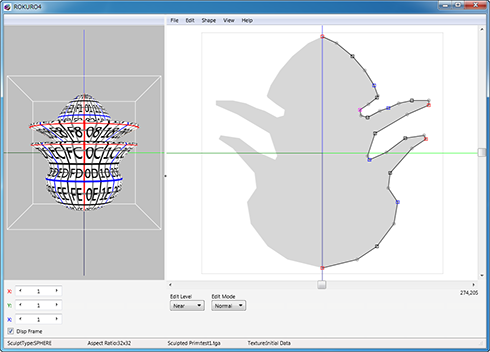
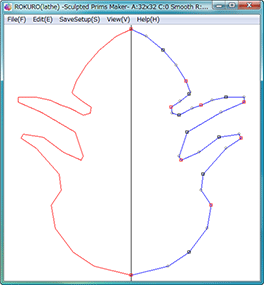
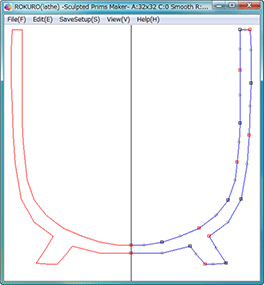
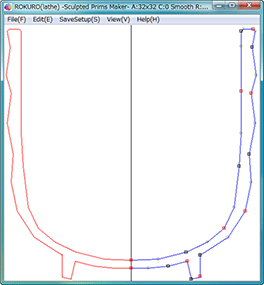
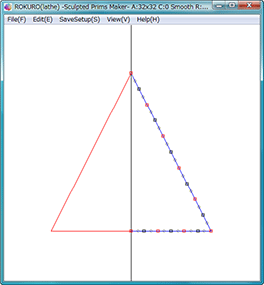
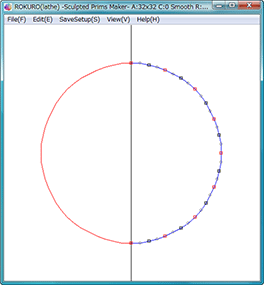
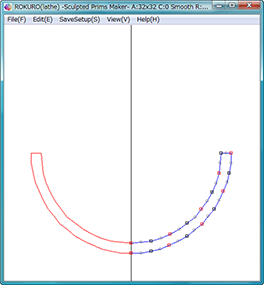
- 1) The screen shows the cross section of a solid like it might revolve on a lathe.
- The center axis is a black line.
You can edit Object on Edit Pane draging control points. - 2) Save .tga file
- Save menu item outputs Sculpted Prim textures.
The size of the tga file is 64x64. - 3) Save .dae file
- Save menu item also outputs Collada file (.dae file) for Mesh of Secondlife.
Normal vectors are calculated automatically. UV map is the same as a sculpted prim.
The data is optimized to upload the Mesh of Secondlife.
If you select LoD option, you can save 3 levels of Level of Detail files. - 4) Open tga file
- You can open tga file which it saves.
Panes
Preview Pane
You can see the preview of your object.
You can drag an object and make it rotate.
A red point is the control point chosen.
An orange line is the section chosen.
You can stretch the object by x,y,z SpinEdit.
- Disp Frame
- You can check the maximum size of a sculpted prim.
Edit Pane
You can edit your object.
You can select a single control point or a range of points to move together.
You can also lock the selected control points.
When you drag the edit pane while holding the SPACE key, you can move the view of the edit pane.
You can cange LOD edit level by Edit Level combobox on the left-bottom of edit pane.
You can edit selected area by two edit modes. You can change it by Edit Mode combobox on the left-bottom of edit pane.
- Normal Mode
- The 9 control points for editing the selected area are displayed.
When you drag the 8 control points of selected area, the selected points are rotated or moved together.
When you rotate the selected control points with holding SHIFT key, the rotation angle is adsorbed by the grid.
The center control point of selected area is the center of the rotation.
When you drag the 8 control points of selected area with holding down the CTRL key, the selected control points are scaled from the center of the selected area.
When you drag the corner control points of selected area while holding down the SHIFT key and CTRL key, the selected control points are distorted.
- Worp Mode
- The 12 control points are displayed around the selected area.
When you drag the control points of the selected area, the selected control points are scaled from the center of the selected area.
When you release the selection, the selected control points are modified.
When you click the "o" button on the left-bottom of edit pane, the selected control points are modified.
*The stretching has limits;
Menu
on the Edit Pane
File
- New
- You can choose only Sphere.
You can select the size of an object from 16, 32 (Default), and 64. Height and width are selected separately. - Open
- Sculpted Prim Texture is loaded from a bitmap or original XML file format. The formats of the image which can be loaded are .tga .jpg .bmp .png .obj .txt.
*You can open the sculpt-map file of the size of 64x64/128x128/256x256/512x512.
*You can't open Collada file. - Save [FileName]
- You can save the object file which is displayed currently without displaying a dialog box.
- Save
- A sculpted prim bitmap (.tga), .obj file, and XML file is specified and outputted.
*An output sculpted prim bitmap's size is 64x64/128x128. The .obj file can be used by Wings3D and Blender.
*The XML file has the information on the stretch of an object.
*When you upload multiple sculpted prims, please set their "Stitching Type" to plane.
*If you output multiple sculpted prims, you can output the prim position information used by TSUBO to a text file.
*You can save Collada file for the mesh feature of Second Life. The same UV map as the sculpted prim is outputted. Only High "Level of Detail"(LOD) is outputted.
When you select it, you can select following option.
- Scale
- You can set the scale of the object.
- Hard Angle
- You can specify the hard angle of normal vector.
- The optimized vertices
- The vertices are optimized. Almost the same UV map as the sculpted prim is outputted.
- Save .dae and .obj file
- The optimized OBJ file is outputted together. Because the Collada file and the OBJ file use the same texture file, you can use it with SOMATO.
- Setup
- Please check Setup Section.
- Exit
- The program is ended.
Edit
The Some of following "Edit" functions are also available from a right-click popup menu. When you don't select any control points, the popup menu is not enabled.
- UNDO/REDO
- There is a 256-step UNDO and REDO function.
- Align
-
- Horizontal Align
- Chosen control points are lined up on the horizontal axis.
- Vertical Align
- Chosen control points are lined up on the vertical axis.
- Rotate
-
- Rotate+
- A chosen control point turns counterclockwise around those centers of gravity of the chosen control point.
- Rotate-
- A chosen control point turns clockwise around the center of gravity of the chosen control point.
- Equal Intervals
- The interval of three or more selected control points is evenly arranged.
- Equal Distance
- The selected control point is rearranged at equal intervals on the line which connects them.
- Twist+/Twist-
- The object is twisted.
- Maximize
- An object is maximized.
- Lock/Unlock
-
- Lock
- You can lock the selected control points so it may not move.
- Unlock
- You can unlock the selected control points so it may move.
- Unlock All
- You can unlock all the control points so it may move.
- Reverse
- The State of the lock of the control points interchanges.
- Select
- You can choose all the control points, or you can in verse selection.
-
- Select All
- All the control points currently displayed are chosen. When you choose more than one control point, using your mouse, draw a box around the points you want to control together, or select them individually while holding down the "Shift" button.
- Grouping
- You can make the selected control points one group. When you select the control point of a group, all the control points of the group are selected automatically.
- Ungroup
- The selected group is dispersed.
- Ungroup All
- All the groups are dispersed.
- Smooth
- You can smooth disorderly selected control points by three methods.
- Gauss Smooth
- Moving Average
- Horizontal Moving Average
- Vertical Moving Average
- Magnet
- The selected control points are pulled and collected to a single point which can be moved. All the points gathered there will be moved together.
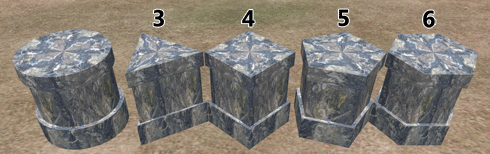
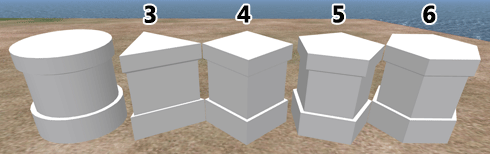
Shape
An object is transformed into a multiple pillar etc.
- Crystallized
- Control points are located only at vertices.
View
- Zoom
- You can expand the editing screen. You can also change magnification by using the wheel of the mouse.
- Grid
- You can display a grid. The control points will snap to the grid.
- Disp Mesh
- You can change a control point and the display of the chosed section.
- Level of Detail
- The level of detail is displayed in three distances: Near, Middle and Far.
- Display Background/Load Background
- You can place an image in the background of the editing screen.
The files types of the image which can be used are JPEG/PNG/BMP/PSD.
Setup
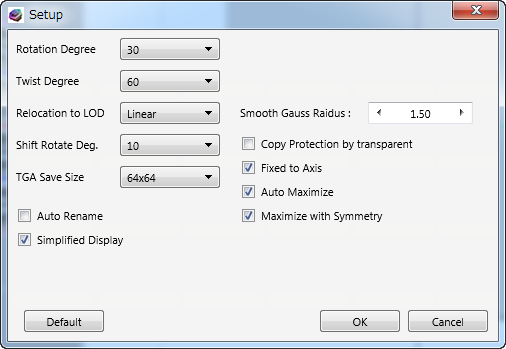
- Rotation Degree / Twist Degree
- You can set up Rotation Degree and Twist Degree.
- Relocation to LOD
- You can choose the way of rearranging control points according to Level of Detail. It is only for preview pane. Please use Edit Level on the left-bottom of the edit pane.
- None
- The control points aren't rearranged.
- Linear
- The control points are rearranged by linear.
- Parent
- The control points stick to the control point of the standard.
- Subdivision
- A control point is rearranged on the curve.
- Shift Rotate Deg.
- You can set up the degree when you turn the selected control point with Shift key.
- TGA Save Size
- You can set up the TGA size of file to save. 64x64 is the recommended size.
- Auto Rename
- When saving a file, you can change the name of a file automatically so that it may not be overwritten.
- Simplified Display
- The function for a more smooth edit. When you drag a mouse, the editing pane has a part omitted and is displayed at high speed.
- Smooth Radius
- You can set up the level of Gauss smoothing.
- Copy Protection by transparent
- When a Prim is modified, you can make it transparent to prevent the texture from being copied by screen capture.
- Fixed to Axis
- You can separate the upper and lower points from the center of rotation.
- Auto Maximize
- You maximize a sculpt-map file automatically and save it.
- Maximize with Symmetry
- You can maximize your object with symmetry by Maximize on Edit menu.
Keyboard Operation
- Move
- If you push an arrow key, the selected control point is moved 1 pixel.
If you press an arrow key and the Shift key simultaneously, it will move 8 pixels.
If you are displaying the grid, control points are moved along the grid points. You can't use the Shift key.
*While you are displaying the Bitmap tab on another pane, the events of the keyboard are sent to a pane on the mouse cursor.
Comments
Stephen Zenith Says,"Rokuro(lathe) for win 1.0 works on Linux too, using wine." Thank you, Stephen Zenith!
Samples
You can download and modify them.
sample1 Download
sample2 Download
sample3 Download

sample4 Download

column sample
column sample(sharp)
Template
Tutorial
Here is a list of tutorial programs that I recommend as very good as a result of my checking the contents.
- SL course on sculpted prims with KJ Georgette at Rockcliffe University
- Natalia Zelmanov's Second Life Diary Sculpted Prims Tutorial Part 3
- videocgaa1395 introduced tutorial video to the public in YouTube. Thank you, BenjaKepler!
- T2GO - Tutorial - Getting started with ROKURO by Lady Hathaway - you can buy it at her shop (L$500).
- Calla's Classes And Workshops - Calla teaches one hour workshops. Calla has also written tutorials in her shops at Calla's Mall.
- *How To Use Rokuro to Make Scupties Calla Cela - You can buy at Second Life Marketplace.
- Kanae_T_1.1.0 Creating Sculpts and Mesh with Rokuro - You can buy from SOMA Designers Guild at Boudoir Isle(L$300).
- Rokuro y Tokoroten (creación de Sculpts y Meshes) at Universo Creativo SL.
History & Archive
01/11/23
- The operating environment has been changed to Windows 10/11.01/16/20
- The operating environment has been changed to Windows 8.1/10.08/26/13 ROKURO 4.27
- CloseQuery Dialog was added.- The mouse cursor management system was updated.
06/03/13 ROKURO 4.25
- The bug of repainting form on XP was fixed.- Mac OS X Retina Display on preview pane was supported.
- Mac OS X Fullscreen mode was supported.
11/29/12 ROKURO 4.20
version 4 first beta11/11/11 ROKURO 3.0.10
ROKURO 3.0 Web Page07/10/09 ROKURO 2.00
ROKURO 2.0 Web Page05/02/08 ROKURO 1.04
06/04/07 ROKURO 0.9
ROKURO 0.9 Mac OSX Web Page05/16/07 ROKURO 0.1
- first releaseDonate
Second Life
The Donate box at KANAE SHOP PhasicFoo/39/14/24.
PayPal
Credits
Thanks to KJ Georgette for help with this Readme file.